It's been quite a while since the last time I bought a Cricut cartridge but I just couldn't resist the Anna Griffin Winter Wonderland cartridge. This cartridge has 50 beautifully layered images. They are very detailed and might take a little longer than usual to assemble but the end results are certainly worth it!
This is one of the newer cartridges packaged in the smaller square box. You need one of the new Universal Overlays to use this cartridge. Most of the designs have at least four layers and the booklet shows very clearly how the tiny pieces fit together.
I got this cartridge a few weeks ago but I have been so busy with family events and commitments that I didn't get to try it right away. My local scrapbook store, Ink About It, is having another holiday contest. Plain banner sections like the one above were available to pick up at the store. When you bring the banner back decorated for the holiday season you have a chance to win a gift certificate to the store. The deadline was today and I managed to get mine finished and dropped off a day early!
A couple of years ago the contest was to decorate little Holiday Houses - you can find the post about the houses HERE.
I had some of this paper by Jenni Bowlin that I bought at the store so I decided it would make a great background for my Anna Griffin images. I wanted to be sure to use at least one thing that I bought at Ink About It on the banner.
The design I chose is actually the reverse side of this paper, "Album" from the Haven line.
I measured a piece of the paper , using the center section of the 12 x 12 page to make sure that I had a symmetrical design. The banners were a slightly odd size, 9 5/8 x 6 7/16 inches and 8 inches from the top to the center point of the notched base.
I decided to use this wreath as the main decoration on my banner. There are four layers and a few tiny pieces to keep track of as you work. The gold "berries" could be replaced with sticky back gems if you want a bit more bling. I used metallic cardstock for the green, red and gold pieces and softer gold shimmer paper for the background and the top layer of the bow. This wreath is on page 21 of the cartridge booklet.
The bow could be cut and used as a separate element. The outline layer is on the same key as the wreath background but you could use the Craftroom to hide the larger cut. The "Joy" sentiment has three layers and is on page 89 of the handbook.
The middle layer has a shadow effect on the word. I used a dark red shimmer paper for this layer. This word was cut at three inches. The wreath was cut at 5 1/2 inches.
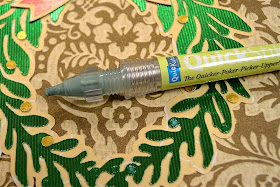
When I add small details to a larger cut, I find it easier to dot the adhesive on the larger shape in the proper locations and then add the tiny pieces to these spots. The Quik-Stik tool helps you place the small pieces accurately.
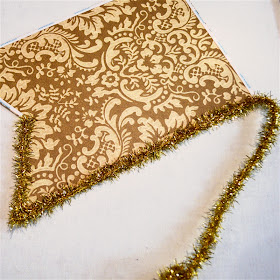
I "auditioned" two colors of sparkly cord to go around the edges of the banner. I originally thought I'd like the red but decided that the gold worked better with the overall color scheme. I think this sparkly cord was from a gift wrapping set. Something similar should be easy to find during the holiday season.
Scor-Tape is a great, non-messy adhesive to keep the sparkly trim on the banner securely. I used the one-eighth inch size and placed strips along all of the edges.
You should be careful not to overlap at the corners to make things go faster when you add the trim.
I started at the center point and then pulled off one section of tape at a time and smoothed down the trim. It works best to have one continuous piece of trim so there is only one join.
I thought about adding some dangly jeweled trim along the bottom edge but then decided to leave well enough alone!
The banner flag will be added to all of the others brought in by customers to decorate the store. I'll get it back in January. I think I may make a few more sections using the same background paper and different designs from the Winter Wonderland cartridge.
There is a 12 days of Christmas sale going on right now at Cricut. Each day a special deal is added so be sure to check and see what is new every day. Click HERE for Cricut's 12 Days of Christmas Deals
Today's Deal
Get the Cricut Expression & Winter Wonderland cartridge for only $159.99! Dec. 7th only
While I certainly enjoy making my own designs for the Silhouette machine, sometimes it is fun to just "plug and play," especially with a beautiful cartridge like this one!
Are you making any new holiday decorations this year? I have designed a lot of snowflakes but I am running out of time to cut them. At least they can be used all winter - they may just have to wait for January!
Subscribe to Capadia Designs if you would like to have new posts delivered directly to your email.
This post may contain affiliate links. If you purchase a product using the link I may receive a commission. I only participate in affiliate programs for products that I use or can recommend without reservation.


Really pretty banner, Diane. It has been SO LONG since we have talked; I hope you are well! Thanks for sharing the 12 days deals!!
ReplyDeletehugs,
Susan
Your banner is beautiful, Diane! Good luck on winning that certificate.
ReplyDelete