Pages

Tuesday, June 30, 2009

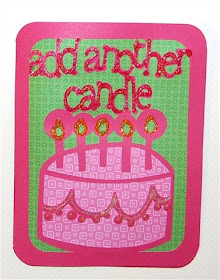
Did someone say Birthday?!?!?!


There are so many great extras on the Lyrical Letters cartridge. Now that it has been added to the Design Studio program, it is rapidly becoming one of my favorites to work with!
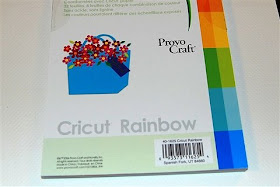


When Provo Craft sent me the cartridges to preview last month, they also sent along some supplies, including several pads of paper. I decided to try these out and make a little project to share.


The Cricut Rainbow paper pad includes solid 6 x 12 inches papers that are double sided. One side is dark (see photo above) and one side is bright and light (see photo below).


I chose the paper that is two shades of pink or rose for my card. The paper has a nice smooth feel and it cut very well in the Cricut. It s a white core paper. I generally don't care for how the DCWV white core paper cuts in my Cricut, but the white edges seemed less obvious with this paper (perhaps because it is not textured).
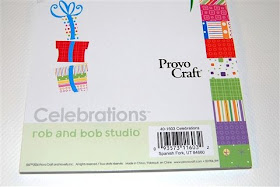


I wanted to choose a liner paper for my aperture card from this paper pad called "Celebrations." There are some very cute small scale designs in this pad.


I had planned to use the "happyhappy" paper but I thought it looked too busy when I auditioned the cut on the paper.
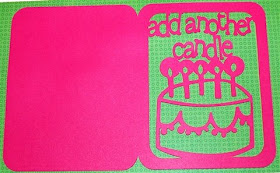


I decided on this green print for my liner.
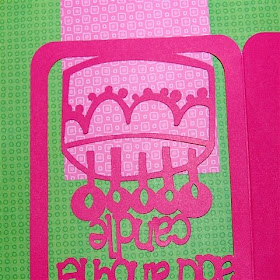


I wanted my cake to stand out from the background paper so I chose this cute all over pink design from the Celebrations paper pad and glued the silhouetted cake to the paper.
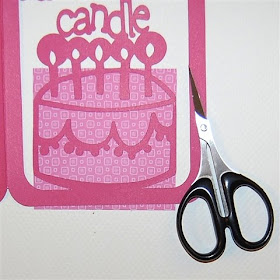


I could have made a better fitting shadow for the cake using Design Studio but I found it easier to adhere a piece of paper that was about the right size (I used a three inch square of paper) and then trim the edges a bit. My tiny Scherenschnitte scissors are perfect for this kind of trimming.
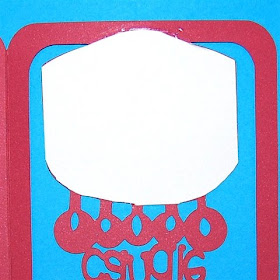


This photo show the back of the front of the card after the paper highlighting the cake was trimmed away at the edges.
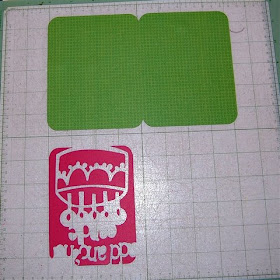


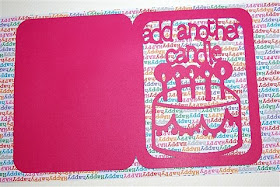
Since I created this card with rounded corners, I made an additional page in the file for a liner that will fit the folded card and fill the aperture. You can put two pieces of paper on the mat, first cut the card, and then simply unload, turn and reload the mat to cut the second page for the liner.


I used a lot of Stickles on this card - in fact, I am still waiting for them to finish drying completely - there has been way too much rain on the East Coast this summer and everything seems damp!
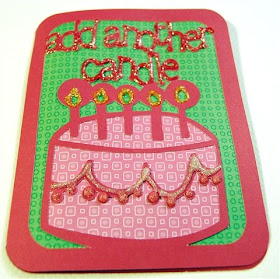


Here is another view of the Stickled card - the glitter really sets things off nicely.
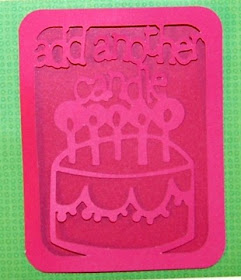


This photo shows the card before adding any lining. You can see the two shade of pink when the card is folded.
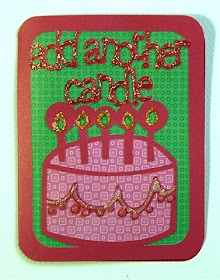


I was able to create this A2 size size card using a rounded frame and the blackout version of the same frame. This card will fit in a standard "invitation" size envelope from the office supply store or you can make your own envelopes. I may revisit this card and add a bit more "bling" or detailing in a day or so - still thinking it over...

(A note about upcoming classes - we did add the Getting Started class that was requested and there are now four lesson times - two Word Books, one Basic Cards and one Getting Started class - posted in the Let me Show you How to Do that blog).


Another Candle Card

Monday, June 29, 2009

I Love it When a Plan comes Together!


Tonight we got the second and third bookcases assembled and ready for the next stage of construction. You can see in the photo how I will set them up with the two that are 2 x 4 cubes back to back and the 2 x 2 cube case on one end. The other end will be inaccessible (perpendicular to a fixed glass sliding door) so I didn't add a case for that end.


My very handy husband went to Home Depot this weekend and bought all of the lumber and wheels to make the platform that will make this a movable island and also the wood for the top work surface. I may have a piece of tempered glass cut for the top but we will see how the painted surface works first.

I spent a little time thinking about the containers for some of the shelves and I was happy to discover that my large Creative Memories Power sort boxes will fit perfectly in the cubes. I plan to get a few more of the plastic cubes that fit perfectly and we have some matching Expedit two drawer inserts from IKEA to build as well. This island on wheels will replace a folding table that is just a bit shorter and narrower with limited space for storage beneath it due to the leg mechanism. I am so excited to have it getting closer to being done and I just can't wait to "move in" to all that storage space!


It was a busy day and I had lots of new projects to think about! I find it relaxing to work on a complicated design when I have a lot of things going on - it helps me to focus my thoughts. So I worked a design that I have had in the back of my mind for some time now - with a lot of variations. Above you can see a screen shot of the preview of the design I was working on - I haven't even had a chance to test the cut yet. There are 50 elements to this design and, since I made it "adjustable," that means 49 of them needed to be nudged into position - which took a very long time.


The first screen shot shows the design as a nearly full page cut (eleven inches square) and the screen shot above shows the same design "adjusted" to a 4 and 1/2 inch square which can be cut on the baby bug mat. I like to make adjustable designs so many people can use them but they are very time consuming and tricky to make. I dearly wish that the Design Studio software would be upgraded to include "select all" and "group/ungroup" functions. I use these functions all the time in my Creative Memories Storybook Creator Plus software and they make it much simpler to create intricate designs quickly and accurately.


Thanks for letting me share the progress on my birthday project - next time you see these units they will be riding on a platform with wheels (and they will be out of the family room and in my studio space).

I will try to test cut the design I showed you very soon - maybe even tomorrow. In the meantime, can anyone guess what cartridge or cartridges I used to design it? (just leave a comment if you think you know).

If you were waiting for our next classes to be posted, we have added a word book class for this week and one for next week as well. There is also another Basic Cards session next week. I have had a request for an evening "Getting Started" session for Tuesday, July 7th at 8:00 p.m. Eastern - if there is enough interest we will add that to next week's classes. You can sign up by following the directions on the LMSYHTDT blog. We only scheduled one class this week due to the 4th of July holiday.

Sunday, June 28, 2009

Baby Bug Fleur-de-lis Mesh (by request)


I posted a full page version of this fleur-de-lis mesh a few days ago. I sometimes do meshes in both full page size and a baby bug size but I created the full page and stopped with that on this design. There was a comment from a reader who has the baby bug and that made me realize that I hadn't done a smaller version - so here it is!


I decided to do my test cut using a busier patterned paper this time. The paper is two sided so it gives me a couple of options.


The cut worked out perfectly - here is the center on the mat after I removed the border.


Here is the border cut after I took it off the mat - the patterned paper makes it even more interesting.


This is the opposite side of the paper - a much more subtle gray design instead of the bold flowers.


Here is the full cut on the bold patterned side...


and on the more monochromatic side.


Once again there are some unusual "leftovers" on the mat.


Above and below are two more views of the mesh design on each side.


I was interested to see how a large patterned paper would work with the cut but I ended up really liking the softer more monochromatic side - particularly when I layered it on another background paper with a design in shades of gray.


I think this would make a lovely background for a page - I am just looking around for the right photos.

Fleur-de-lis Mesh (Baby Bug Size)

Saturday, June 27, 2009

A successful shopping trip!


We made the trip to IKEA today - and now I can really get organized! We found the Expedit shelves and did a little figuring to be sure that we could get the configuration that would fit my space and create a comfortable work and storage area.


I ended up with two bookcases that have 4 x 2 cubes and one that is a 2 x 2 cube. The first box we opened had lots of pieces - and no directions!


Fortunately, the second large box did have the directions!


They were fairly simple to assemble, but it is a bit fiddly getting everything to line up.


Here is the first large set put together - we will do the rest tomorrow and then my husband has promised to build a platform on wheels to hold the three of them together as a movable island (they will be horizontal, not vertical as this one was in the photo). I want the entire unit to end up at countertop height so the platform will help to raise the shelves up - and I will be able to move it within my space if I need to have more floor space.


I got a couple of these plastic inserts - I will probably get some more for the lower level of shelves. The 2 drawer units that match the shelves were also reduced from $30 to $15 so I got some of them for the upper level.


With the other Saturday activities and the 60 miles roundtrip to do our shopping, I didn't have much of a chance to do any crafting today - but I did make this card for my neighbor to take to a graduation party.


I used Lyrical Letters for the "Congrats" and the diploma is from Wild Card. I cut the first diploma from glitter cardstock and then I created a shadow in Design Studio to help it stand out from the background paper. I added a bit of bling for the ribbon around the diploma and layered a cute patterned paper and red cardstock on the white 5 x 7 card. I also used the metallic cardstock from the DCWV Citrus cardstock stack - that mirror finish is so shiny and pretty (but hard to photograph!).


I can't wait to get my "birthday" shelves in place tomorrow (and thanks to those of you who sent me birthday wishes - my birthday is actually not until the second week of July but I wanted to get my organization project done before then so I can celebrate in style!)

Friday, June 26, 2009

A Day of Errands...


This was a day of errands and house projects - so many things have been piling up around here. So off I went to the bank and post office and Costco and so on and so on! I am making a lot of progress on the reorganization of my crafting space and the upstairs bedrooms. I even manged to do some ironing! I hope to get to Ikea tomorrow for some early Happy Birthday to me (!) shopping - I have my eyes on the Expedit bookcase.


I wanted to share this photo. You may remember that I helped my sister make a couple of the characters from "Cars" for her grandson. He was very excited to have them and these are the "garages" he built for the paper cars. I think it is so cute - he is only two!


I put together another quick card using the narrow border from the group I designed using the Stand and Salute cartridge (here is a LINK to that post).


I used the DCWV Luxury Stack for the border- it has such a pretty sheen. The card itself is Bazzill Basics in one of my favorite shades of blue. I suppose you could stamp a small sentiment along the center band of the border. I simply added some "Skittles" (flat backed plastic dots) at the low points of the scallops.


It is just a simple notecard, but wouldn't a box of these make a nice gift?

Jen and I will be posting next week's classes soon - if you want to know right away when we post new classes you can subscribe to or follow the Let me Show you How to Do that blog. Wish me luck on the shopping trip tomorrow - I hope you have a great weekend!

Thursday, June 25, 2009

Fleur-de-lis Mesh (Home Decor)


One of my favorite things to do with the Design Studio software is to make lace cardstock mesh pages. It is always interesting to see the designs that can be created by simple repetition of one design element.


This fleur-de-lis mesh is made from the fleur-de-lis on the Home Decor cartridge.


Here is a closer view of the fleur-de-lis. I think this is a particularly nice shape with great detail. I made a mesh with seventy fleurs-de-lis (seven rows of ten). That is a very large number of welds - the design is complex and takes a long time to cut. You can call a friend, do the dishes, throw in some laundry and have a cup of coffee and then (maybe) it will be done cutting! Be sure that your paper is well stuck to the mat and use medium weight cardstock with a smooth finish to try to insure a clean cut.


I was lucky - this design cut perfectly the first time I tried it. I carefully lifted the outer edges off the mat.


The border design that results from this cut is rather pretty and I will save this to use for a scrapbook page.


Take your time lifting the full page cut from the mat. I find my wide plastic putty knife to be a very valuable tool for a job like this! (you can get these at the hardware store for a dollar or two).


Once the cut is lifted, there will be lots of bits left on the mat. Of course, I did save the larger shapes (I can't throw anything that might be useful away!).


I don't know what to call these shapes - if you look at the one on the right you might see a viking with fluffy pigtails...


I decided to trim off the "horns" and ended up with these shapes that cold be corner accents...


...photo corners...


or even lined up for a border - there are lots of possibilities.


I also like the look of the mesh turned 90 degrees so the flowers are to the sides - you can see a "3" in the design this way.


The paper I used to test the cut was two sided - above you can see the slightly patterned opposite side (remember, you can click on the photo for a larger view). I think I may try this again with a very bold and bright paper and see how that looks.

If you use this file for a project, I'd love to see how it turns out.


(I am not posting a digital challenge this week - there may be one next Thursday. If you wanted to try Challenge #8 you have an extra week to try it).


Fleur-de-lis full page mesh