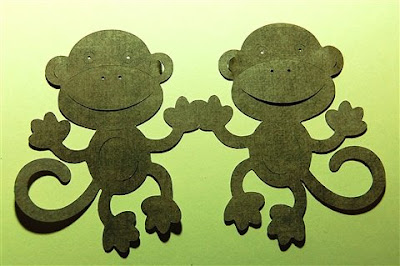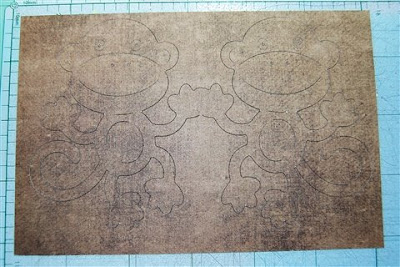
OK - it's time for a little more monkey business! I have had some questions about the detail cutting and I will try to answer them today (don't worry - I will get those medallions I promised posted tomorrow!).
Some readers who are new to Design Studio did not realize that the image detail cuts ("webbing" is the term used by Provo Craft in the FAQs) were lost when welding shapes together so I think my excitement with this discovery was a bit hard for them to understand. If you are just getting started with Design Studio it will be easier for you to begin doing projects because solutions to many common problems have been found. I actually enjoy trying to find "workarounds" for the problems and limitations I find in the program. I do wish that as the software updates are released there would be more information provided about the changes to the program so users would not have to figure out all of the implications of the updates on their own.
About the mat.... Several people asked about the two stage cutting with concerns over the mat loading. You do not do anything to the mat after you load it the first time to begin the cutting process. Simply cut one page and then the other - the order does not matter and the machine will make the cuts placed on each mat in the correct locations. When you have finished both cuts you can unload the mat.
How to get the "hide selected contour" back.... There was also confusion about the copying and pasting which results in the loss of the "hide selected contour" option and the need to close the file. I do not know why the option is lost after pasting but it is quick and simple to close the file and then reopen it. You do not have to shut down the entire program and wait the minute or so it takes to reload - just close the file and open it again - an odd quirk but it seems to "reset" the option.
Can it all be on one page? Some people wondered if by doing various combinations of operations you could have the entire design on one mat - yes, you can, but it is a bit easier to see what you are doing and to remember where you are in the process if you use multiple mats - one feature I particularly like about Design Studio is the ability to have many pages in the file - this makes designing easier in many cases.

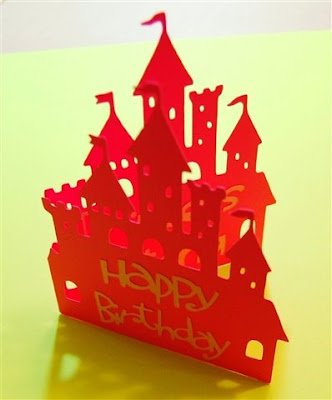
Just for fun I redid the file all on one page and took some screen shots to explain the steps - I also added in a few of the more basic things I was mentioning for those who are really new to Design Studio (such as copying, pasting and flipping). Some of these I have previously explained in my blog (here is a LINK to an old post about the Castle Card pictured above) but there are lots of newcomers who may appreciate a bit more of a step by step explanation.

Begin your new project and use "save as"in the file menu to save the file for the first time with whatever name you choose.

Start by placing a monkey on the mat then, click "welding", and then, while the monkey is selected, click "copy"

Then click "paste" - the new monkey is pasted directly on top of the first monkey (notice how the outline of the monkey is darker - this is because there are two monkeys in the same position).

Next, be sure that you check flip (welding should be checked if you checked it before copying and pasting)

You monkeys will look like this....

Use the handle on the center left side of the selection box to slide the flipped monkey to the right and align the monkeys so their hands are joined.

Now, copy and paste each monkey and slide each new monkey to the side so you can see the outlines.

If you try to select the hide contour option on the new monkeys the option will be grayed out and unavailable.

Close the file by selecting close in the file menu

This box will appear - click yes, then reopen the file

The option to hide contours on the pasted monkeys is now available.

Select the lines you wish to hide by left clicking on the exact line and then right clicking and choosing "hide selected contour" you also need to be sure that "welding" is now unchecked.

In order to position the detail monkey correctly, select the welded monkey and check the X and Y coordinates, then select the detail monkey and enter these values in the selection box (the Y value should be correct already).

Follow the same steps for the detail monkey on the left. Don't worry if you have "lost" the handles on the right side and can't slide the monkey back into position - when you enter the values into the Shape Properties box it will move into place (you can also use the keyboard arrow keys to move selected objects around on the screen).
You now have the welded monkeys and the unwelded monkeys directly on top of them on the same mat. When I tested the cut the details cut first and then the outline - all in one click of the scissors icon!
I hope that this helped you to understand the process a bit better. I will probably continue to use multiple mats which also gives me the option of cutting the welded shapes without the details if that suits my projects better.

One more tip - if you bend the cut a bit at the detail marks, the monkey has more of a three dimensional look (I pushed the ears up and the mouth open a bit!).

Thanks for the explanation. You are just way too smart!! I love that you like to do all of these fabulous things with DS; can't wait to see what you will be doing next.
ReplyDeletek-
This is so cool!!!!!
ReplyDeleteI also didn't realize that when you open the file back up you can hid contours on any and all images! TFS.
Amazing! Thank You for this info!! This will save some layers on my cards!!
ReplyDeleteYou are so creative!!
Thank you soo much for being stubborn and figuring this out for us..I am very thankful for your advice.
ReplyDeleteHeather R.