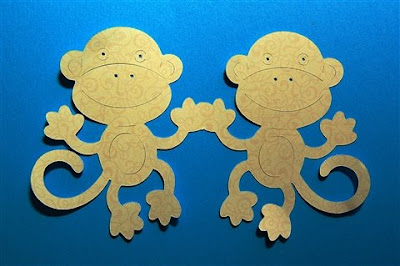
One of the frustrating things about welding shapes in Design Studio is that the "detail" cuts on the shapes are eliminated once you check "weld." In the past, I have tried to work around this by adding back details using the markers but I haven't been entirely happy with the results - the effect is not the same as having those defining cuts.
This morning I suddenly realized that there might be a way around this problem now that we can use the "hide contour" feature. I was so excited to test out my idea!
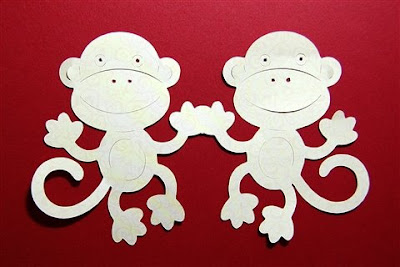
I welded two monkeys from the New Arrival cartridge together (I flipped the second one so they could hold hands). Then I copied and pasted the monkeys on to a second mat and unchecked the "weld" box on each of them. I closed the file and reopened it to make the "hide contour" feature active for the copied and pasted shapes - hide the outer line of the monkeys and, holding my breath, clicked "preview" - this is what I saw

A few discouraging words passed my lips as I let my frustration get the better of me! But I am nothing if not determined (some would say stubborn) and I decided to just give it a try - after all when you preview a regular unwelded shape the detail lines are not dark like the cutting lines - so what did I have to lose?
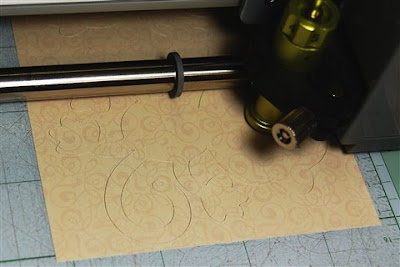
First, I cut the page with the welded monkeys - below you can see it in the machine after cutting - there are no detail lines.
I left the mat in place and went to the page where I had hidden the outer contours, pressed cut and the Cricut proceeded to cut only the detail lines! Here is what it looked like after cutting the second page.
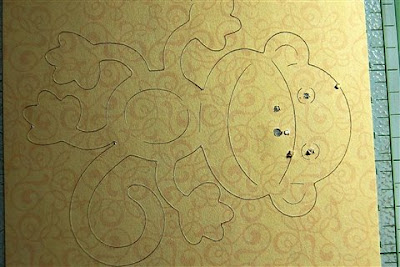
And below is a photo of the welded monkeys with the detail cuts!
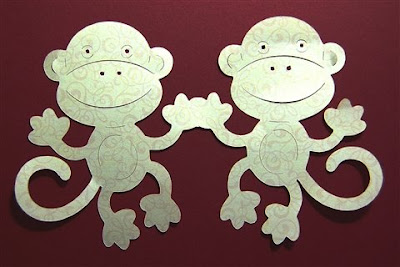
If you look at this cut you can see that the holes for the eyes and noses came off the mat - this is because they actually were cut twice - details of welded images that are actual full cuts (like these tiny circles) have always cut on a welded object.

So I went back to my detail page and hide those circles as well.

Above is the cut just after unloading the mat - the cuts are made but the paper hasn't been pulled up.

You may be able to see it a bit better in the second photo with the excess paper removed.
By following this procedure you can have a cut that looks like this...

instead of this....

I also tried it with another little monkey welded to a phrase from the cartridge. Even though the preview screen looks like this

After cutting, first the welded page and then the page with detail cuts only, it looks like this - there are detail lines! (The cut is on an A2 card).
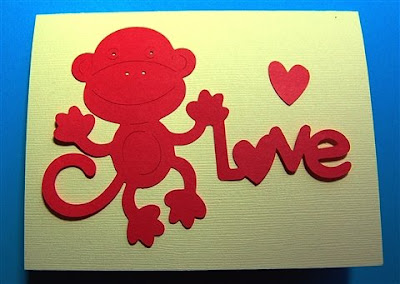
These little monkeys are doing the Happy Dance with me!
In case you have trouble understanding exactly what I did, I took a few screen shots. First, set up your design with the welding check for each shape - in preview it will look like this.

Then select each shape and copy and paste it to a new page in your file. When you copy and paste the shape is placed in exactly the same place on the new page so everything will line up correctly. Since you copied and pasted to get the shapes in the right place - the hide contour feature will not be available. Close the file and then reopen it to make the feature active.

Then left click on each line you want to hide - in this case the outline of the shape of the monkeys and the four small circles for their eyes and noses. When the line turns red, right click and choose "hide selected contour" (as shown above).

Make sure that the weld box is not checked for the shapes on the detail page.

After hiding the contours your page will look like this - the hidden lines turn blue.

Above is a view of the single monkey detail page (it is a bit easier to see the hidden contours here). Remember, you should not unload your mat between cuts to insure that the details lines will be properly placed.

Are you excited about this? I know I am and I have all sorts of ideas about designs I can make using this idea! Experiment with it and have fun - and let me see what you are making!
(I know I promised more medallions for today but I was too excited to wait to share this! I won't be available most of the rest of the day so, if you have any questions, please be patient - I will answer emails and comments tomorrow).
This simple file is available here so you can use it for reference (or make some cards!).
Monkeys with Details

WOW that is great
ReplyDeleteDiane,
ReplyDeleteThis is great!! I can't wait to try it out. You are so talented !!
Thanks for all you do!!
WOW! Thanks!
ReplyDeleteYou are brilliant!!
ReplyDeleteTFS
Rita
You are incredible!!! Thank you for sharing with us-it is a huge help.
ReplyDeleteDenise
Diane,
ReplyDeleteYou are so amazing!!! I check your blog daily and I am always learning new things. I have been wanting to be able to do this for so long, and now I can THANK YOU THANK YOU THANK YOU!!!
Dany
This is awesome - thanks for sharing! You are wonderful with DS ;)
ReplyDeleteGreat idea! One question: After the first cut, do you leave the blade where it ends or do you hit load paper to go back to the top before beginning the 2nd cut?
ReplyDeleteOMG! Diane, you are amazing! That has been SUCH a frustration. And the monkeys are absolutely adorable! I think I need to cut those for a friend with twins in NICU.
ReplyDeleteI do have a suggestion for smaller items--cut the details first. You know how those little things like to move after they have been cut.
Thanks bunches!
Jill
You are brilliant! You have such a creative mind. I copied the details in my Cricut "help" folder. THANK YOU SOOOO MUCH!!!!!
ReplyDeleteDiane, thanks for sharing the great information. I can only imagine that your smile was as big as those on the happy dancing monkeys. You are so creative!
ReplyDeleteI think you should change your name to Sherlock Holmes! What a great find.
ReplyDeletenow you could replace the blade with the ink for the features couldn't you? No cuts, no holes, just smilly monkeys.
ReplyDeleteAh thank you... This will help alot.
ReplyDeleteDiane, that's such a great idea!!! LOVE IT!!! My silly question too... Do you have to hit load paper to go back to the top before you cut the details on the second page?
ReplyDeleteYou're so awesome!!
ReplyDeleteDiane, this is fantastic! I always felt like something was missing but couldn't quite put my finger on how to fix it! Thanks for sharing this little tidbit!
ReplyDeleteCindyS. from Cricut MB
To answer a couple of questions - no, you don't have to press "load paper" between cuts. The software will take the blade to the correct position on the mat and make the cuts. Just cut one page and then cut the second page - details and welds in all the right places!
ReplyDeletegreat idea, thanks for sharing, Els
ReplyDeleteDiane thanks, great tip.
ReplyDeleteTake care Linda
Fantastic, thanks for this and all your other tutorials. You are amazing.
ReplyDeleteeileen
Oh how awesome!!! You are so incredibly talented!! What an awesome discovery thanks to your persistence!!!!! I just wish I had that cart...those monkeys are so cute...and I can see them doing the happy dance with you Diane. Thanks so much for sharing with us.
ReplyDelete{{{{{{{{{{{HUGS}}}}}}}}}}}
Vicki
Diane - you are amazing and so incredibly generous sharing your talents with us. Thanks for figuring out how to do this.
ReplyDeleteWAY TO GO MS SMARTY PANTS!! :)
ReplyDeleteWow Diane, thank you so much for sharing. And making it sound so easy.
ReplyDeleteThanks for sharing this discovery with us. I have a query for you. Instead of closing and reopening to make the Hide Contour feature work on the copy, could you not leave the copied images intact and hide the features on the original figures? Would that work?
ReplyDeleteBetty
This is the best ever! I've learned to weld with you and did several cards as you know without the DETAIL CUTS - BUT NOW, wow-wee! I can get the best projects now and not do it the hard way. Yep, I did the cuts by hand and I did the markers too. Thank you for figuring out the EZ of doing it.
ReplyDeleteI just want to say THANK YOU for figuring this out - I have been a bit frustrated with the lack of features!
ReplyDeleteI've been following you for a while - and I just think you're brilliant - and so kind to share all you learn and do.
You inspire me! Thank you!
Terrific!!!
ReplyDeleteThat is a major lightbulb moment if ever saw one. Thanks for sharing this! Much appreciated.
ReplyDeleteThank you so much for sharing your information - AGAIN!
ReplyDeleteLinda4_2
I love your monkey instructions..
ReplyDeleteYou've got us all doing the happy dance. What a terrific discovery this is. Thanks for sharing all your findings in such detail that we'll be able to use the techniques in our own designs.
ReplyDeleteI'm still new to DS and I just discovered the "problem" of no details when cutting welded objects. I'm working on some VBS things for my church (Vacation Bible School). We have a western theme this year and I was welding the rope letters from the Old West cart to make some Thanks teacher appreciation bag toppers. Well, I was very surprised when the rope pattern did not show up in my cuts. Now I can fix this! Thank you, Diane!
ReplyDeleteThis is great! I get that way where I just keep trying till I figure things out. I am not that familiar with the DS but can do the same thing on my Gypsy Woman! Thanks.
ReplyDeleteVery helpful. Thank you for sharing such great details.
ReplyDeleteCan you copy and paste shapes onto another mat when using the Gypsy? Or only DS?
ReplyDeleteThanks!
Hi Dana,
ReplyDeleteYes you can copy and paste onto another mat on the Gypsy.
First select the item you want to copy, then go to the next mat and then tap the "duplicate" button (it looks like two squares overlapping). Unfortunately, on the Gypsy the item will not be in exactly the same place on the mat and you will have to change the "x" and "y" values to make it match - just a few extra steps.
I hope that helps.