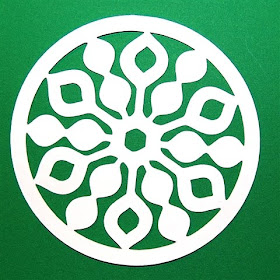
you can still have snowflakes in circles! Quite a few people have asked me how to do the snowflakes in circles if they don't have the George cartridge. Since George is an "exclusive" cartridge that is officially sold only with the original Cricut it can be hard to come by.
Tonight I went through all the cartridges in the Design Studio and found that there are quite a few that have a silhouetted circle. If you have Christmas Cheer, Doodletype, Going Places, Mini Monograms, My World, New Arrival, Opposites Attract, Paper Pups, Storefront, Wedding, Wild Card or Word Builder 3 - Ocean of Words, you will be able to put some snowflakes in circles! The width of the circle silhouettes varies so you should look through the cartridges from this list and check the circles on the ones that you own to see which width circle you prefer. If you want to duplicate the George circle as closely as possible, place a George silhouetted circle on the mat to see which one matches it most closely.
Once you find a silhouetted circle that you like, you can make your own circled objects (snowflakes or otherwise). Since some of these circles were intended to be used as layers, you should check the "Real Size" box under the virtual keypad to create your circle. I would suggest working with a circle of four inches or so, to make it easy to see what you are doing. Next, select the snowflake of your choice and test the correct size to fit in that circle. To do this, you should click somewhere else on the mat to start a new selection box and add a snowflake of the size you think will fit. You should use the slider bar to select the size of the snowflake so you can duplicate it in the next step. Then grab the upper left handle to move the snowflake into position. This step will save your "nudging finger" later. Check the"weld" box for both the circle and the snowflake and preview the weld. If the snowflake is too large or too small, delete it, set a new size on the slider bar and try again.
When you have found the correct size of snowflake to fit in the circle and weld nicely, you can leave the snowflake in position on the mat and click on the line of the circle to select the circle. Then add a snowflake of the size you found to work - it should appear right next to the circle in the same "selection box" (the dotted lines around the design). Use the "nudge" arrows to move it to the left and up or down into the same position you placed the independent snowflake. When they are perfectly lined up, you can use the center left handle and slide the entire design to the right. Click on preview to check the weld and you are done!
You have now created an adjustable design - it is quick and easy since there are only two elements to move into position. You can copy, paste, rotate, stretch, skew and resize this new design.
I will try to add a few screen shots to help all of the "visual learners" - I wasn't able to do a full tutorial tonight (this afternoon had my first appointment with the dentist for the crown I need due to my tooth breaking a few weeks ago and I just couldn't get an illustrated lesson ready to post tonight - feeling some pain after all that stretching and drilling!). I just wanted to let my readers know that there are some alternate methods to get the same or a similar design.
Let me know how you things works out if you try making your own circled snowflakes and email me or leave a comment if you run into problems or have questions. Have fun with this - once you get started it is hard to stop!

No comments:
Post a Comment
Thanks for taking the time to leave a comment. I love to hear from the people who read my blog. I moderate all comments to keep spam off the blog without making you decode the squiggly letters so your comment may not appear immediately.