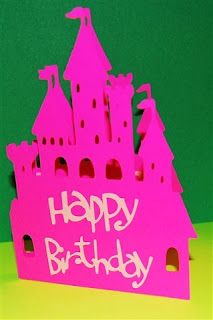
The Design Studio software opens up so many possibilities for creating unique cards. There are many shapes that can be used to make interesting "shaped cards" for all occasions.
I created this card with my neighbor to help her get started on using the software - I will explain how we did this step by step to help others learn this simple technique.
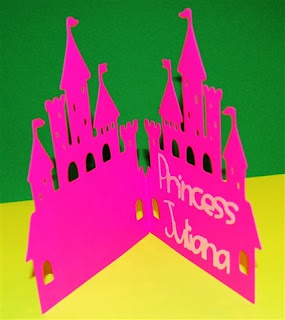
Here is the inside of the card
To create a card, find a shape you would like to use and place it on the right side of the mat - we used a castle from the Paper Dolls Dress Up cartridge.
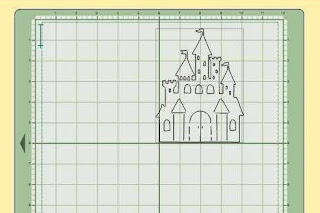
 Click "weld" in the shape properties box while the first castle is selected. Then copy and paste the castle image using the quick buttons at the left of the screen (second and third from the top)
Then click "flip" in the Shape Properties box at the top right of the screen (both "weld" and "flip" should be checked on the second castle).

the result will look like this
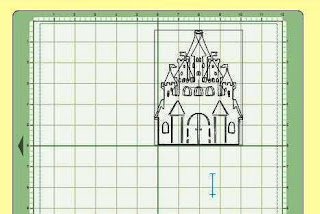
Select the top "flipped" image and use the blue "handle" in the center of the left side to pull the image to the left along the horizontal axis
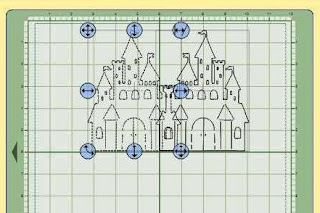
Move the second castle into position so that a symmetrical image is created and preview to check the cut. You will notice that the interior detail lines appear "grayed out" - this means that they will not be cut - leaving a solid area for your message
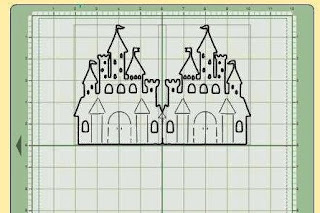
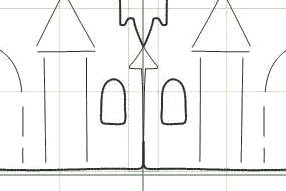
By using the 200 view you can check the center weld - here you can see that due to the shape of the castle there will be a cut going up about 1/2 inch from the bottom of the fold.
To minimize this, find another shape to weld on top of the area that you do not want to cut - try to use something on the same cartridge - for a bit of fun I chose the canoe to demonstrate! Be sure to click weld after selecting this filler shape.
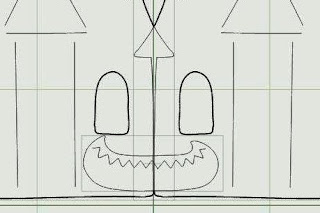
The canoe is entirely "grayed out" and will not cut but will weld the two sides together in the area we wanted to cover - I left it up a bit from the base to make the scoring of the fold of the card easier (the line will be more obvious because of the little notch).
Preview the new cut by clicking on the "eyeball" (second from the bottom of the left buttons)

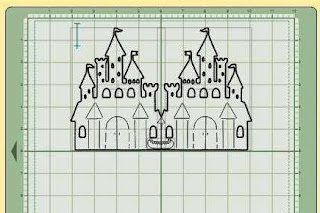
For a clearer view, click on the top button for a new page and preview on that page - it will look like this
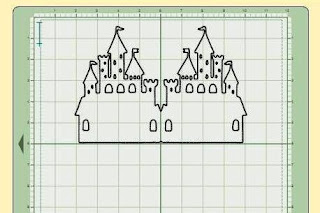
We decided that the font from ZooBalloo would be a good choice for this card (there was also a pre-made "Happy Birthday" phrase on that cartridge), but you can make your words in whatever font pleases you. You can use pre-made words, weld your own words or do your own lettering by hand.
I left the second page of the file intact so you could see the approximate size for the words that will fit on this card

This card looks cute standing up
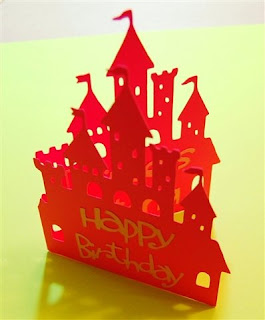
and fits perfectly in an A2 envelope
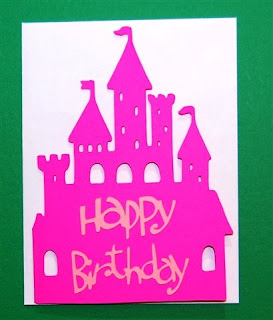
The offcut will be centered and could be used for a scrapbook page - possibly for journaling or as a creative cut out around a photo

Obviously you will need to change the name on the second page of this file which I left for sizing purposes.
Simple Castle Card

I love the castle card. Thanks for the cut file and for the instructions.
ReplyDeleteWow!! Great tutorial! This card is absolutely beautiful!!
ReplyDeleteDang cute! Thanks for sharing the file and your great step-by-step instructions!
ReplyDeleteThis card is spectacular! Thanks for sharing.
ReplyDeleteThat was a great tutorial. It is great to see it broken down into a simple explanation. Thank you for sharing your knowledge and hard work.
ReplyDeleteHello Is it possible that I'll get the file of the castle?
ReplyDeleteThanks a lot Great job Wilhelmina
I love the castle card. I REALLY appreiate your screen shots and explanations. Thank you.
ReplyDeleteHi Wilhelmina,
ReplyDeleteThe file is available by clicking on the words "Simple Castle Card" in bold and underlined at the end of the blog entry.
Have fun with it - the cards turn out very cute and you can do lots of decorating - the example in the post is just a basic starting point.