
I have been working on various designs that can be adapted for many different scrapbook pages or cards. When I do workshops or individual sessions with clients in my Creative Memories business and my custom scrapbooking work these will be useful and adaptable for many projects. I am trying to build frameworks that can be customized for particular situations.
I decided to try some photo mat overlays. I did an entire set with the openings at exactly 4 x 6 inches before checking and then realized that they needed to be slightly smaller since "4 x 6 photo paper" is not always exactly 4 x 6 inches. So I went back and adapted them, reducing the openings by just a bit to ensure full coverage. I do not want to post anything that I have not tested out first since that would not really be a time saver or help to anyone else if they had to repair my errors!
So, with many "burpings" to get the welding correct I have made horizontal and vertical versions of photo mats for the four seasons using the phrases from Stretch Your Imagination and George for the frames.
Here are some examples of how they look over a photo


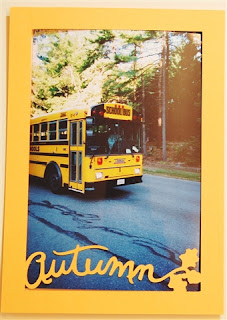
I did try the markers again and did not care for the way the lines almost completely filled in the words - they also did not show up as clearly on the photo as you can see below:

Of course this would depend on the contrast to the area of the photo that the words overlay and I do like the way the markers look if you choose to use the overlay/mat for a journalling box instead of a photo, like this:

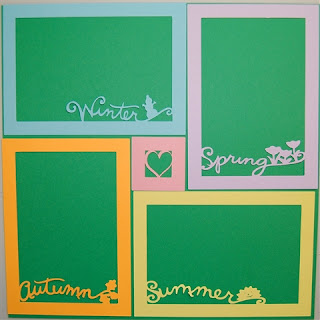
You could do a page with a photo for each season (two vertical and two horizontal) and even use the little 2 x 2 grid filler in the center like this:

Here they are with the opposite set of mats and a different center:
Once you have the .cut file you can go in and do a "Save as" and changed the decorative bit to a phrase, a shape, a name - anything you want. You can also move the decorative word or shape to a position that suits your photo the best. Just be sure to check "weld" and do a preview to see if the cut is correct. If it is not,"burp" the design to get the frame to work - just click on one of the frame rectangles and "copy" and "paste" it and pull it off to the side. Then delete that original rectangle and add the new one back in exactly the same place (you can check the positioning information in the upper right corner of the screen in Design Studio). Preview to check it and then Happy Cutting!
Here are the links for these mats:
Vertical Winter
Vertical Spring
Vertical Summer
Vertical Autumn
Horizontal Winter
Horizontal Spring
Horizontal Summer
Horizontal Autumn

THese are beautiful! Thanks for sharing.
ReplyDeleteThis comment has been removed by a blog administrator.
ReplyDeleteYou are so clever, love the seasons photo mats!
ReplyDeletethese are awesome thank you for sharing and the idea of the grid filler!!!! and all the different ways horiz/vert thank you for taking the time!!!!
ReplyDeleteHi - i just removed a post because it came through twice from Kopperhead - thanks for the nice responses - still learning how to manage the blog!
ReplyDeleteOh my goodness..I've been trying to do the exact same thing inside of an oval and for the life of me I cannot get it..Please share how this is done..thank you..
ReplyDeleteI don't think anyone has figured out how to get something welded inside an oval yet - the problem is you have to be able to "build" the shape from other shapes so you can add and subtract one side to get the interior weld. I just linked another blog with a good explanation of welding inside a frame (Cricut Lovers guide to Design Studio - see left side of page).
ReplyDeleteI fooled around with this a bit and tried to use the "o" from Jasmine as the oval since it has an opening but I can't get the shape to be close enough to a real oval. I'm sure we will all keep trying and maybe someone will get it - or there will be a program update (please!) to fix this.
Can you please explain "burping"
ReplyDeleteCheck out the link to "Cricut Lovers Guide to Design Studio" in the "Some of my Favorite Places" on the right side column - you'll find a great explanation there and some other helpful stuff too!
ReplyDelete